What is iSCSI?
iSCSI is a standard specification for storage space networking based on the Internet Protocol, which is suitable for linking many data storage devices. iSCSI runs SCSI commands on an IP network for data to be transmitted over a local area network (LAN), wide area network (WAN), or the Internet. With iSCSI, the operating system of the client computer treats the space on the storage server as a local hard disk. In fact, the data of the hard disk is transmitted to the storage server through the network.
What are iSCSI Targets and LUNs?
In SCSI terminology, a LUN (logical unit number) represents a SCSI logical device that can be individually located. This device is part of a SCSI physical device (called Target). The iSCSI environment simulates a connection to a SCSI hard disk. An iSCSI Target is like a connection interface, and a LUN is actually a numbered hard disk. When an iSCSI initiator (client) is connected to an iSCSI Target, all LUNs mapped on the iSCSI Target are also connected to the client's operating system. Therefore, the initiator can create and manage file systems on these iSCSI LUNs just as you would a SCSI or IDE hard drive that has not been formatted.
1. Preparation before starting work
This article assumes that you have completed the following tasks:
1/ Hardware installation of Synology NAS.
2/ Create iSCSI LUNs and Targets on Synology NAS.
After the above setup is complete, you can refer to this article to learn how to connect an iSCSI target to Multipath (MPIO).
See the Quick Setup Guide for more information on how to install your hard drive and software. You can also refer to the Synology NAS User Guide (available at Synology's Download Center) for a general overview of the topics covered in this article.
2. Add iSCSI Target
This section walks you through the steps to set up an iSCSI target on Windows Server.
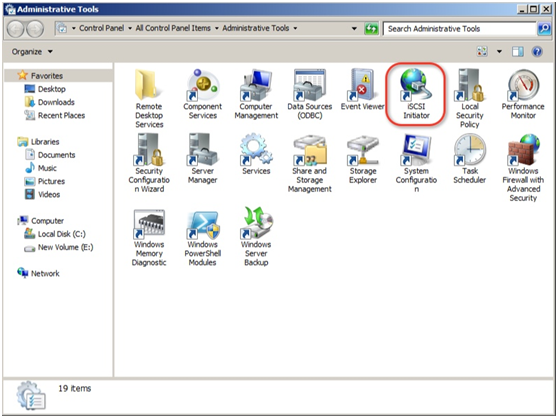
Open the iSCSI Initiator on Windows (in Control Panel > Administrative Tools).
Go to the Discovery tab and click Discover Portal.

Enter the IP address or DNS name of the Synology NAS hosting the iSCSI Target and click OK.

Please go to the target tab.
Select the desired iSCSI target.
Click Connect.

If the advanced option is not enabled in the Synology NAS's iSCSI target, click OK.

If CHAP or any advanced option is enabled in the Synology NAS's iSCSI target, click Advanced.

Enter the name of the CHAP.
Enter the target key for CHAP.
Click OK.
The iSCSI target is now connected to a Windows computer.

3. Format the iSCSI Target for use on Windows
Once an iSCSI Target is connected to a Windows computer, it must be formatted before use.
Under Control Panel > Administrative Tools, open Computer Management.

Select Hard Disk Management in the left panel. Right-click on iSCSI Target (Disk1) and select Online.

Right-click iSCSI Target (Disk1) again and select Initialize Hard Disk.

A prompt on the side will be displayed to keep you on the newly added hard drive. Please select the partition type that is best for this drive and click OK.

After the hard disk is initialized, right-click on the new hard disk (indicated by the black bar) and select the new simple volume.

Continue with the simple volume wizard.

Specify the volume capacity for the new hard disk and click Next.

Assign a drive letter to the new drive and click Next.

Now, your Windows Server has an extra hard drive E: Created by a Synology iSCSI target.

Note:
If you want to use Multipath I/O (MPIO) for iSCSI targets on your Synology NAS, do the following:
Go to Storage Manager > iSCSI Target.
Find the iSCSI target you want and click Edit > Advanced.
Check the multiple sessions allowed from one or more iSCSI initiators.
Click OK.